DonJoy Shoulder Brace Instructions: A Comprehensive Guide
This guide details proper DonJoy shoulder brace application for comfortable support during recovery․ We’ll cover steps, adjustments, and maintenance,
helping you regain optimal shoulder function․
Remember to consult a medical professional for personalized guidance․ Proper brace use is crucial for effective healing and preventing further injury․
Understanding these instructions will maximize the benefits of your DonJoy shoulder brace․
Understanding Your DonJoy Shoulder Brace
DonJoy shoulder braces are engineered to provide stabilization and support following injury or surgery․ These braces aren’t simply restrictive devices; they’re designed to facilitate a controlled range of motion, crucial for the healing process․ Different models cater to varying levels of support needed, from post-operative immobilization to rehabilitation exercises․
It’s vital to recognize that a DonJoy brace is a medical device, and its effectiveness hinges on correct application and adherence to your healthcare provider’s instructions․ Understanding the brace’s purpose – whether it’s to limit movement, protect healing tissues, or assist in regaining function – will empower you to use it correctly․
Familiarize yourself with the specific features of your model․ Some braces offer adjustable range-of-motion settings, while others prioritize compression or focused support․ Knowing these features allows for personalized comfort and optimal therapeutic benefit․ Proper understanding is the first step towards a successful recovery․
Types of DonJoy Shoulder Braces
DonJoy offers a diverse range of shoulder braces, each designed for specific needs and injury types․ The UltraSling is a popular choice for basic shoulder support and immobilization, often used after rotator cuff repairs or dislocations․ For more substantial stabilization, the FullForce brace provides rigid support and adjustable range-of-motion control․
The React Shoulder brace is designed for active individuals, offering a dynamic fit and targeted compression․ DonJoy Iceman incorporates cold therapy to reduce pain and swelling, ideal for acute injuries․ Furthermore, specialized braces exist for glenohumeral instability or specific post-surgical protocols․
Selecting the appropriate brace depends on the severity of your condition, your activity level, and your physician’s recommendations․ Understanding the differences between these models ensures you receive the optimal level of support and protection․ Consult your healthcare provider to determine the best DonJoy shoulder brace for your individual needs․
Components of the Brace
A typical DonJoy shoulder brace comprises several key components working together to provide support and immobilization․ These generally include a shoulder pad, designed to comfortably distribute pressure and stabilize the glenohumeral joint․ Arm cuffs secure the brace around the upper arm and forearm, providing a snug and adjustable fit․
Straps, often made of Velcro, are crucial for customizing the brace’s compression and positioning․ Many models feature hinges allowing controlled range of motion, adjustable via specific settings․ Some braces incorporate padding for enhanced comfort and to prevent skin irritation․ Buckles ensure secure strap fastening․
Understanding each component’s function is vital for proper application and adjustment․ Familiarize yourself with how each part interacts to achieve optimal support․ Regularly inspect these components for wear and tear to maintain the brace’s effectiveness and your safety․
Indications for Use
DonJoy shoulder braces are commonly prescribed for a variety of shoulder conditions requiring support and immobilization․ These include rotator cuff tears, aiding in healing by limiting excessive movement․ Shoulder dislocations and subluxations benefit from the brace’s stabilizing effect, preventing re-injury․
Post-surgical support is a frequent indication, protecting the repaired tissues during the recovery process․ Glenohumeral instability, where the shoulder joint feels loose, can be managed with a brace to enhance stability․ Labral tears, often causing pain and clicking, may also warrant bracing․
It’s crucial to use the brace as directed by your healthcare professional․ Self-treating without a proper diagnosis can be detrimental․ The brace is intended to support healing, not to replace appropriate medical care and rehabilitation exercises․

Preparing to Apply the Brace
Before application, gather all brace components and ensure the patient is comfortably positioned․ Proper skin preparation is vital for optimal fit and to prevent irritation during use․
Gathering Necessary Materials
Before initiating the application process, meticulously assemble all required components of your DonJoy shoulder brace․ This includes the main brace body, arm cuffs (typically two), shoulder pads of varying thicknesses, and all associated straps – both circumferential and those used for securing the cuffs․
Ensure you have access to any supplemental padding that may be needed for enhanced comfort or to accommodate individual anatomical variations․ A mirror can be helpful for the patient to visualize the process and ensure correct positioning․
Additionally, have readily available a soft cloth or wipes for skin preparation, as well as any prescribed skin barrier products if the patient has sensitivities․ Finally, keep scissors handy, though use them cautiously, only if minor strap adjustments are necessary․ Having everything organized beforehand streamlines the application and minimizes discomfort for the patient․
Positioning the Patient
Optimal patient positioning is paramount for successful DonJoy shoulder brace application․ Ideally, the patient should be seated comfortably in a chair with good back support, allowing for full shoulder and arm exposure․ Alternatively, if seated is difficult, a supine position (lying on their back) on a firm surface is acceptable․
The affected arm should be relaxed and hanging naturally at the side, avoiding any forceful abduction or adduction․ Encourage the patient to maintain a neutral shoulder posture – neither rounded forward nor excessively retracted․
If possible, have the patient gently lean slightly forward to facilitate easier access to the posterior aspect of the shoulder․ A healthcare professional should stand facing the patient, providing clear instructions and visual guidance throughout the process; Proper positioning minimizes strain and ensures accurate brace placement․
Skin Preparation
Prior to applying the DonJoy shoulder brace, meticulous skin preparation is essential to prevent irritation and ensure optimal adhesion․ The skin around the shoulder, upper arm, and potentially the torso (depending on the brace model) must be clean, dry, and free from any lotions, oils, or powders․
Gently wash the application areas with mild soap and water, then thoroughly dry with a soft towel․ Inspect the skin for any existing abrasions, open wounds, or rashes․ If present, address these concerns before proceeding, potentially delaying brace application until healed․
Consider using a skin prep solution (as recommended by a healthcare professional) to further enhance adhesion and reduce the risk of skin breakdown․ Ensure the solution is completely dry before applying the brace․ Proper skin preparation promotes comfort and brace effectiveness․

Application Instructions: Step-by-Step
Follow these sequential steps for correct brace application․ Opening, shoulder pad placement, cuff securing, strap adjustments, and fit checks are vital for optimal support and recovery․
Step 1: Opening the Brace
Begin by carefully opening the DonJoy shoulder brace․ Most models feature a hinged design with adjustable straps and closures․ Gently unfasten all straps – typically Velcro – to allow full access to the brace’s interior․
Inspect the hinges to ensure they move freely․ These hinges are crucial for allowing controlled range of motion․ If they feel stiff, gently manipulate them to restore smooth operation․
Lay the brace flat on a clean surface․ This provides a stable base for positioning the shoulder pad and arm cuffs․ Familiarize yourself with the brace’s components before proceeding․
Identify the anterior (front) and posterior (back) sections of the brace․ Correct orientation is essential for proper fit and function․ Ensure the padding is clean and free of debris before application․
A fully opened brace allows for easy patient positioning and secure application․
Step 2: Positioning the Shoulder Pad
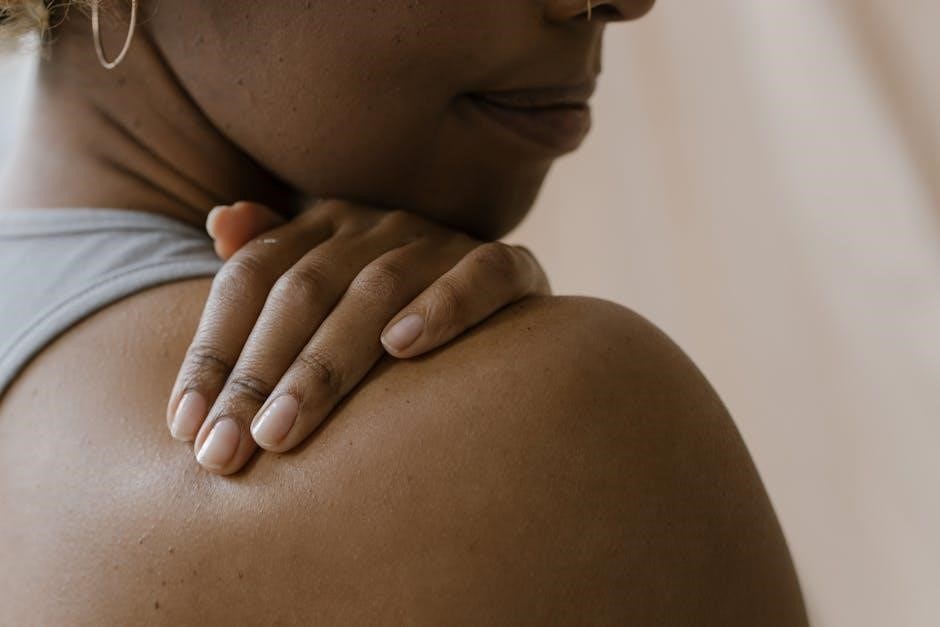
With the brace open, carefully position the shoulder pad․ This pad should contour to the patient’s deltoid region – the rounded part of the shoulder․ Ensure the pad sits comfortably and doesn’t cause any immediate pressure points․
The pad’s placement is critical for stability and support․ It should be centered on the shoulder, extending slightly anteriorly and posteriorly․ Proper alignment distributes force evenly, minimizing discomfort․
Some braces have adjustable pads; customize the position for optimal fit․ Consider the patient’s anatomy and the specific injury when adjusting the pad․ A snug, but not overly tight, fit is ideal․
Ensure the pad’s material is directly against the skin, or over a thin, breathable layer․ This maximizes contact and prevents slippage․ Avoid bunching or folding of the pad, as this can create pressure sores․
Correct shoulder pad positioning is the foundation for a secure and effective brace application․
Step 3: Securing the Arm Cuffs
After positioning the shoulder pad, proceed to secure the arm cuffs․ These cuffs wrap around the upper arm and forearm, providing additional stabilization․ Begin with the upper arm cuff, gently guiding it into place․
Ensure the cuffs are aligned correctly, typically with the pad facing inwards․ Avoid twisting or bunching the material, as this can restrict circulation and cause discomfort․ The cuffs should fit snugly, but not constrictively․
Most DonJoy braces utilize Velcro straps for cuff attachment․ Fasten these straps gradually, starting with the proximal (closer to the shoulder) strap, then the distal (closer to the elbow) strap․
As you tighten the straps, monitor the patient’s comfort level․ Ask for feedback to ensure the cuffs aren’t too tight or causing any pressure points․ Adjust as needed for a secure, yet comfortable fit․
Properly secured arm cuffs are essential for maintaining brace integrity and providing optimal support․
Step 4: Adjusting the Straps

With the arm cuffs secured, focus on adjusting the brace’s straps for a personalized fit․ These straps control compression and support levels, crucial for effective immobilization and comfort․
Begin with the primary shoulder straps, tightening them gradually and evenly․ Avoid over-tightening, which can restrict blood flow or cause skin irritation․ The goal is firm, supportive compression, not constriction․
Pay attention to the patient’s feedback throughout the adjustment process․ Ask about any pressure points or discomfort, and make adjustments accordingly․ Small increments are best․
Many DonJoy braces feature multiple straps allowing for customized support․ Experiment with different tension levels to find the optimal balance between stability and comfort․
Ensure the straps lie flat against the body, avoiding bunching or twisting․ Properly adjusted straps distribute pressure evenly, maximizing brace effectiveness and patient comfort․
Step 5: Ensuring Proper Fit
After strap adjustments, a final fit check is essential for optimal brace function․ Confirm the shoulder pad sits securely and comfortably against the shoulder, without causing pressure points or chafing;
Assess the arm cuff positioning, ensuring they aren’t too tight or loose․ Proper cuff placement stabilizes the arm and prevents unwanted movement during recovery․
Ask the patient to perform gentle range-of-motion exercises, like arm raises and rotations, to evaluate the brace’s impact on movement․ Observe for any restrictions or discomfort․
Check for skin irritation or redness under the brace straps and padding․ Address any issues immediately by readjusting the straps or adding extra padding․
A well-fitted DonJoy brace should provide firm support without compromising comfort or circulation․ Reiterate the importance of reporting any ongoing discomfort to their healthcare provider․

Adjustments and Customization
Fine-tune your DonJoy brace for personalized comfort and support․ Adjust range of motion, add padding, and resolve fit issues to optimize healing and mobility․
Adjusting Range of Motion Settings
DonJoy shoulder braces often feature adjustable range of motion (ROM) settings, allowing controlled movement during rehabilitation․ These settings are typically controlled via hinge adjustments on the brace’s arm cuffs․ Consult your physician or physical therapist to determine the appropriate ROM limits for each phase of your recovery․
Locate the ROM control knobs or buttons on the brace․ These are usually marked with degrees (0-120, for example)․ Carefully adjust the settings to restrict or allow movement in specific directions – flexion, abduction, external/internal rotation․ Start with more restrictive settings early in recovery and gradually increase the allowed range as your shoulder heals and strength improves․
Ensure both arm cuffs are set to the same ROM limits for balanced support․ Regularly check the settings to confirm they haven’t shifted during activity․ Improper ROM settings can hinder healing or cause discomfort, so always follow your healthcare provider’s recommendations․ Document your settings for future reference․
Padding and Comfort Modifications
Maximizing comfort is crucial for consistent DonJoy shoulder brace wear․ Many braces include pre-installed padding, but additional modifications can enhance fit and reduce skin irritation․ Consider using closed-cell foam padding in areas prone to rubbing, such as around the shoulder, arm cuffs, or chest strap․

Cut the foam padding to the appropriate size and shape, ensuring it doesn’t interfere with brace functionality or hinge movement․ Secure the padding with medical-grade tape or adhesive․ Wear a thin, moisture-wicking undershirt beneath the brace to minimize sweat and friction․
Adjust strap tension frequently to prevent pressure points․ If skin irritation occurs, discontinue use and consult your healthcare provider․ Experiment with different padding placements to find what works best for your anatomy and activity level․ Regularly inspect padding for wear and tear, replacing it as needed․
Addressing Common Fit Issues
Proper fit is paramount for DonJoy shoulder brace effectiveness․ A common issue is bracing that feels too tight, restricting circulation․ Loosen straps incrementally until comfortable, ensuring the shoulder remains supported․ Conversely, a loose brace offers inadequate stability․ Tighten straps, focusing on the arm cuffs and chest strap, to achieve a snug, secure fit․
If the brace slips during activity, check strap tension and ensure the shoulder pad is correctly positioned․ Consider adding additional padding to improve grip․ Skin irritation often stems from friction; use a moisture-wicking undershirt and adjust padding․
Uneven pressure can cause discomfort․ Redistribute padding and re-evaluate strap placement․ If hinge alignment seems off, consult a medical professional․ Regularly inspect the brace for damage that could affect fit․ Small adjustments can significantly improve comfort and support․

Care and Maintenance
Regular cleaning extends your DonJoy brace’s life․ Inspect frequently for wear and tear, ensuring all components function correctly for optimal support and safety․
Proper storage prevents damage․
Cleaning Instructions
Maintaining hygiene is vital when using a DonJoy shoulder brace․ Regularly cleaning your brace prevents skin irritation and bacterial buildup, promoting optimal healing and comfort․ For routine cleaning, gently hand wash the brace using mild soap and lukewarm water․ Avoid harsh detergents, bleach, or abrasive cleaners, as these can damage the materials and compromise the brace’s functionality․
Pay close attention to areas that come into direct contact with your skin, such as the shoulder pad and arm cuffs․ Thoroughly rinse the brace to remove all soap residue, and then air dry it completely in a well-ventilated area․ Do not use a dryer or direct heat, as this can cause the materials to shrink or deform․
For more stubborn stains or odors, you can use a diluted solution of isopropyl alcohol and water, but always test it on a small, inconspicuous area first to ensure it doesn’t cause discoloration or damage․ Ensure the brace is completely dry before reapplication to prevent skin irritation and maintain its supportive properties․
Storage Guidelines
Proper storage extends the life of your DonJoy shoulder brace and maintains its effectiveness․ When not in use, store the brace in a cool, dry place away from direct sunlight and extreme temperatures․ Avoid storing it in damp environments, such as bathrooms, as moisture can promote mold and mildew growth, damaging the materials․
To prevent deformation, avoid placing heavy objects on top of the brace during storage․ A breathable storage bag or container is ideal, allowing air circulation and preventing dust accumulation․ Ensure the brace is completely dry before storing it to avoid any potential mildew or odor issues․
Regularly inspect the storage area for pests or rodents that could damage the brace․ Keep the brace away from chemicals or solvents that could degrade the materials․ Following these guidelines will help ensure your DonJoy shoulder brace remains in optimal condition for continued support throughout your recovery process․

Inspecting for Wear and Tear
Regular inspection is vital to ensure your DonJoy shoulder brace continues to provide optimal support and function․ Before each use, carefully examine the brace for any signs of damage, including cracks in the plastic components, fraying of the straps, or tears in the padding․
Pay close attention to the buckles and hinges, ensuring they are secure and operate smoothly․ Check the range of motion settings to confirm they are functioning correctly and haven’t become loose․ If any damage is detected, discontinue use immediately and contact your healthcare provider or DonJoy customer support․
Worn or damaged components can compromise the brace’s effectiveness and potentially lead to further injury․ Replacing damaged parts promptly is crucial for maintaining proper support during your recovery․ Consistent inspection contributes to a safer and more effective healing process․

Troubleshooting Common Problems
Addressing issues like slipping, skin irritation, or strap problems ensures optimal brace function․ Adjustments and proper fit are key to resolving discomfort and maximizing support during recovery․
Brace Slipping
Brace slippage is a common issue, often stemming from improper initial application or loosening during activity․ First, ensure the brace was opened fully and positioned correctly on the shoulder, with the shoulder pad seated firmly․
Next, meticulously re-tighten all straps – arm cuffs and torso straps – ensuring a snug, but not overly constricting, fit․ Avoid gaps between the brace and your body․ If slippage persists, consider adjusting the range of motion settings; a more limited range can sometimes improve stability․
Check the padding; inadequate padding can contribute to movement․ Adding additional padding (refer to the ‘Padding and Comfort Modifications’ section) may help․ Regularly inspect the straps for wear and tear, as compromised straps lose their ability to maintain tension․ If the problem continues, consult your healthcare provider or a DonJoy specialist for further assistance․
Skin Irritation
Skin irritation under the DonJoy shoulder brace can occur due to friction, moisture, or allergic reaction to the brace material․ Proper skin preparation is crucial; ensure the skin is clean, dry, and free of lotions or powders before application․
Consider wearing a thin, breathable undershirt or sleeve beneath the brace to create a barrier․ If irritation develops, discontinue use and inspect the skin for redness, rashes, or blisters․ Adjust the brace to ensure it’s not too tight, restricting airflow․
Explore padding modifications (see ‘Padding and Comfort Modifications’) to reduce pressure points․ If the irritation persists, or worsens, it could indicate an allergy․ Discontinue use immediately and consult a healthcare professional․ Cleaning the brace regularly, as outlined in the ‘Care and Maintenance’ section, can also help prevent irritation․
Strap Issues
Common strap issues with the DonJoy shoulder brace include loosening, slippage, or difficulty securing them properly․ Regularly check strap tightness throughout the day, especially during activity, and readjust as needed․ Ensure straps are routed correctly through the brace buckles and aren’t twisted․
If straps consistently slip, consider replacing them – contact DonJoy customer support for compatible replacements․ Difficulty securing straps might indicate improper brace size or application; review the ‘Application Instructions’ section carefully․
Avoid over-tightening straps, as this can restrict circulation and cause discomfort․ Inspect straps for wear and tear, such as fraying or damage to the Velcro, and replace them if necessary․ Proper strap management is vital for maintaining brace effectiveness and patient comfort․